Growing Fall Collards
go.ncsu.edu/readext?720190
en Español / em Português
El inglés es el idioma de control de esta página. En la medida en que haya algún conflicto entre la traducción al inglés y la traducción, el inglés prevalece.
Al hacer clic en el enlace de traducción se activa un servicio de traducción gratuito para convertir la página al español. Al igual que con cualquier traducción por Internet, la conversión no es sensible al contexto y puede que no traduzca el texto en su significado original. NC State Extension no garantiza la exactitud del texto traducido. Por favor, tenga en cuenta que algunas aplicaciones y/o servicios pueden no funcionar como se espera cuando se traducen.
Português
Inglês é o idioma de controle desta página. Na medida que haja algum conflito entre o texto original em Inglês e a tradução, o Inglês prevalece.
Ao clicar no link de tradução, um serviço gratuito de tradução será ativado para converter a página para o Português. Como em qualquer tradução pela internet, a conversão não é sensivel ao contexto e pode não ocorrer a tradução para o significado orginal. O serviço de Extensão da Carolina do Norte (NC State Extension) não garante a exatidão do texto traduzido. Por favor, observe que algumas funções ou serviços podem não funcionar como esperado após a tradução.
English
English is the controlling language of this page. To the extent there is any conflict between the English text and the translation, English controls.
Clicking on the translation link activates a free translation service to convert the page to Spanish. As with any Internet translation, the conversion is not context-sensitive and may not translate the text to its original meaning. NC State Extension does not guarantee the accuracy of the translated text. Please note that some applications and/or services may not function as expected when translated.
Collapse ▲If you haven’t made plans to plant your fall collards, now is the time to start that process. Collards are a southern staple that can be found on many holiday tables. Packed with vitamin A and K, this easy to grow crop is worth the investment.
Collards are a cool-season crop that grows best during cooler temperatures of spring and fall. Collards will also survive the winter in Pamlico County, although freezing weather may burn some leaves. Difficulties of producing a fall crop are early warm temperatures that can slow growth, and a higher volume of insect pests.
If you can locate transplants, go ahead and get them in the ground. Bring soil pH up to 6.0-6.5, and supply enough nitrogen fertilizer to keep plants green and actively growing. For average soils, use 1-2 lbs. of 10-10-10 per 100 square feet before planting. Side-dress with ¼ pound of nitrogen fertilizer like 21-0-0 per 100 square feet, 3 to 5 weeks after the seed comes up or after transplanting, and 2 to 3 weeks after that.
You can also direct seed collards into your garden, leaving approximately 15 inches between plants. You can also grow your own transplants by seeding plants in rows 2-3 inches apart with in-row spacing approximately 2-4 inches. In about 6-weeks you can dig these bare-root plants up and transplant them into the garden with proper spacing. Variety suggestions include Morris Heading, Yellow Cabbage, Vates, Blue Max, and Top Bunch.
Frequent watering will be required during hot sunny days. To improve early growth of small seedlings, shading may be required. The biggest pests include four-legged animals, imported cabbage worms, diamond back moths, and cabbage loopers. A regular insecticide application will probably be required until colder temperatures arrive. Physical barriers like row covers may help prevent insect infestation, but they will also increase growing temperatures. Therefore, they provide the greatest benefit during cooler temperatures and early spring.
Common insecticide recommendations include the active ingredients carbaryl (Sevin), Bt (Dipel), permethrin, bifenthrin, and spinosad. Small insects are easier to control, so keep a look out for activity. Read and follow label directions and pay attention to harvest restrictions (time between application and safe harvest) and maximum applications per year. Rotate products when possible.
Some disease issues may arise, but they usually occur with excessively wet conditions and from saved seed or plant debris left in the garden. If possible, plant on new ground or areas in the garden that did not have a Brassica crop (cabbage, collard, broccoli, etc.) in the spring. Remove plant debris and cultivate deeply. Avoid overhead irrigation when possible. Soil splashing onto leaves and water splashing from infected plants will spread most common collard diseases.
Harvesting collards is accomplished by several different methods. Some folks will harvest young plants for salad greens, while other will allow the plants to mature and then harvest the entire plant. They will then remove the leaves from the stalk and consume the leafy portions. Others may harvest leaves from plants as the plant matures, allowing the plant to produce a continuous crop of new leaves. This provides a lengthy harvest that can stretch the growing season through
winter.
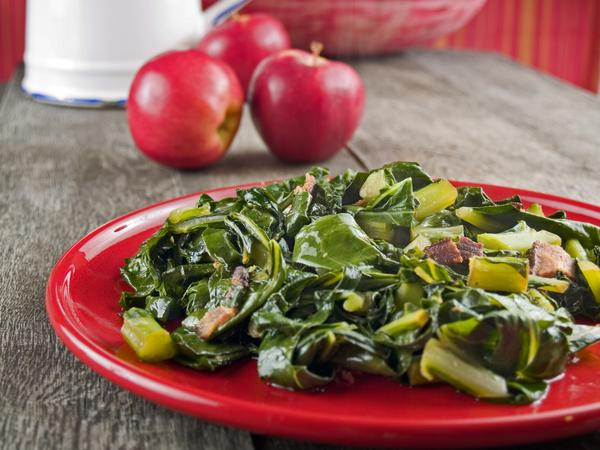
Traditional recipes include cooking chopped greens with fat and oil from bacon, smoked or salted meat. Cooking times range from minutes to hours depending upon taste and preference. For simple recipes, you can follow this link to the NC State Extension Publication titled “Collard Greens, Grow It, Eat It”.
When purchasing collards for cooking, choose bunches with dark green leaves with no yellowing. Refrigerate collard greens in a plastic bag for up to five days. When preparing collards for cooking, trim stems and woody pieces, and rinse collards thoroughly to remove any traces of grit. Chop into pieces, as needed, for recipes. To freeze collards, start with the freshest greens you can find—about a handful per serving. Blanch the washed, trimmed greens in a large pot of boiling water for 3 minutes, then immediately immerse in a bowl of ice water. Drain thoroughly and place in freezer-safe storage containers, removing as much air as possible to prevent freezer burn. Freeze immediately.
For more information on growing collards or planting a fall garden, contact Daniel Simpson at 252-745-4121 or daniel_simpson@ncsu.edu.


